iLoveToCreate Teen Retro Christmas Photo Frame
Grandma’s Gift Idea
Copyright Margot Potter
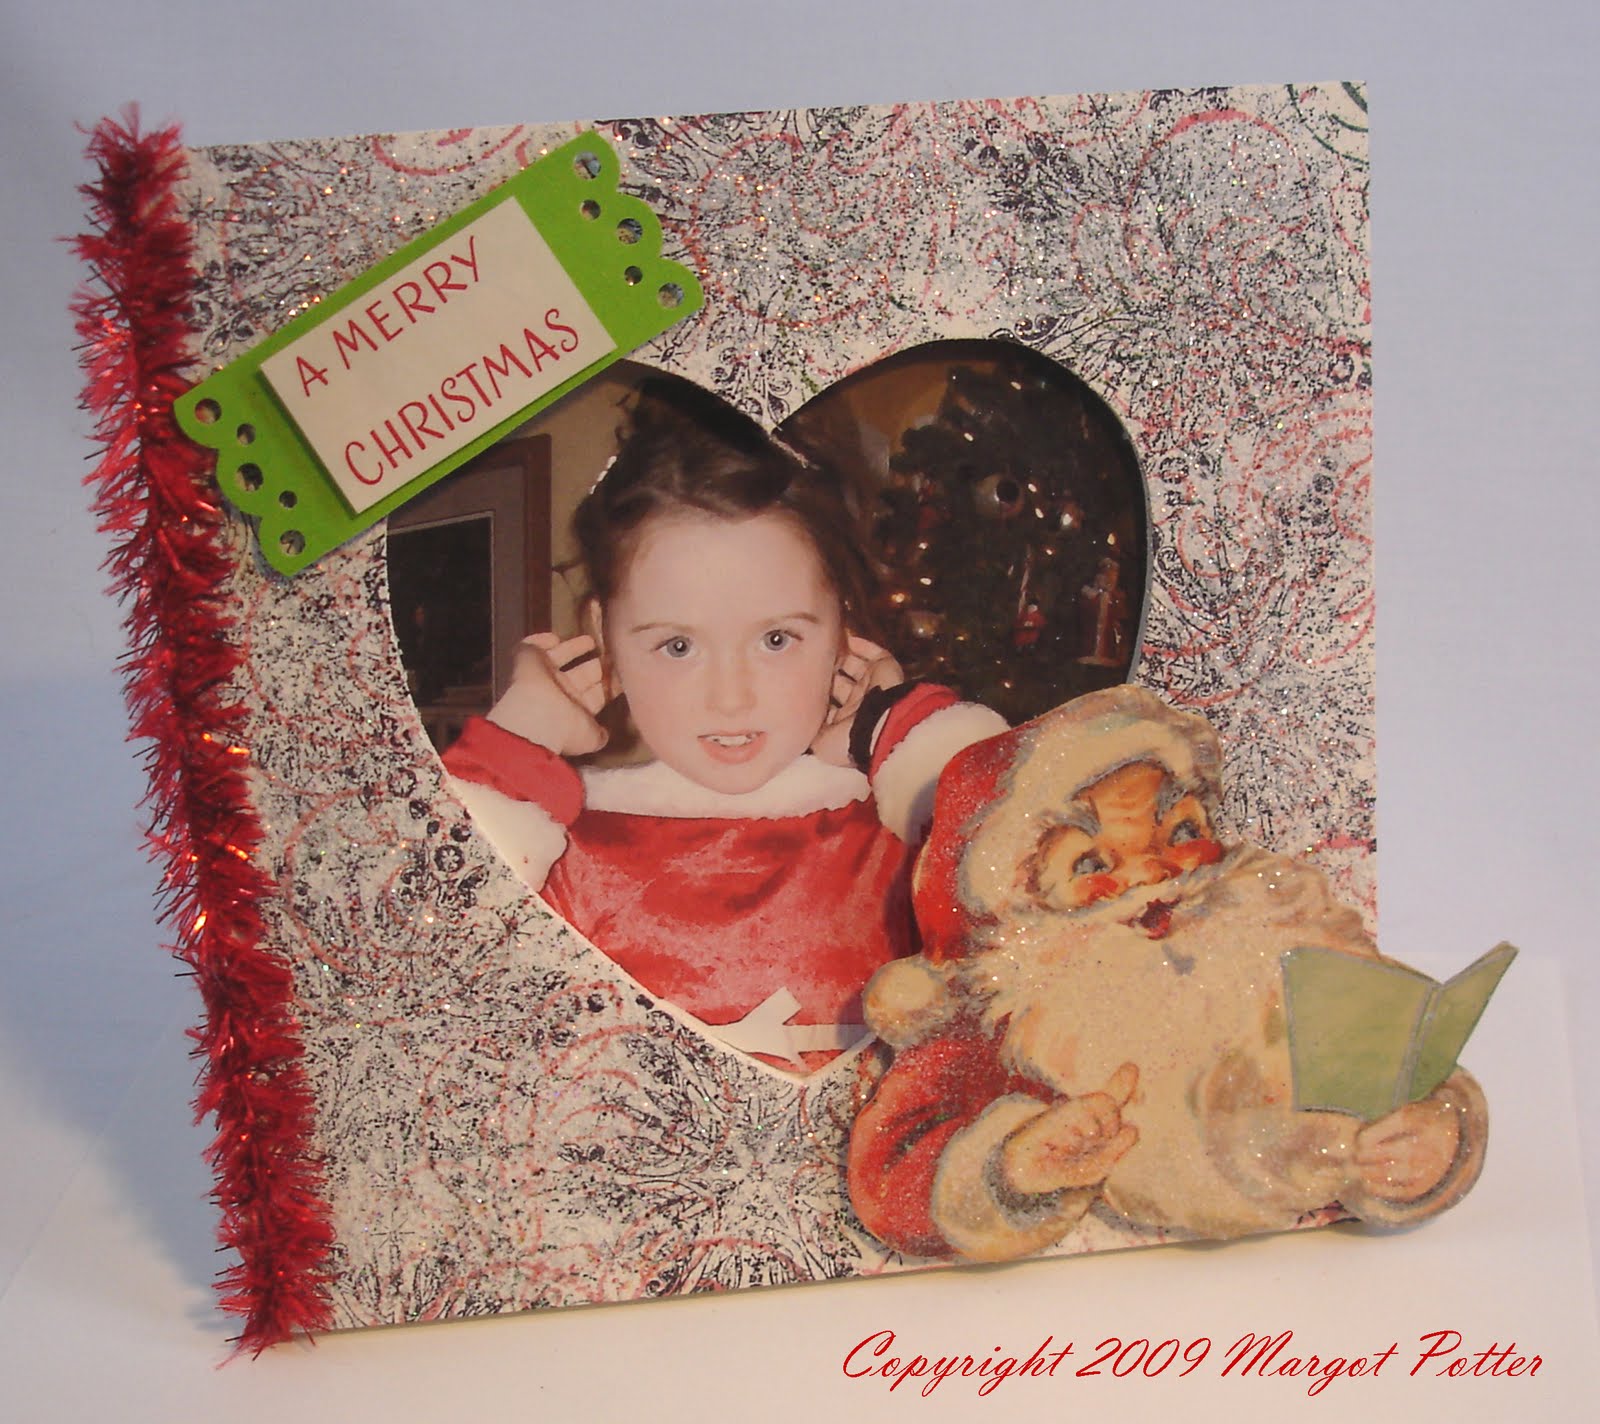
“Mom crafted, kid approved.”I’ve been collecting vintage goodies for over 26 years now. Much of my collections have been pared down due to the lack of storage here at our little school house and my many moves. The one collection I can keep expanding and justify for my work is my ephemera. That’s a fancy word for vintage paper. I just scored a little stash of 1950s era Christmas cards and I knew I had to use them for an iLoveToCreate project. (Truth be told these aren’t much older than me...which of course makes me vintage but I’m in denial.)
This frame cost a buck and the rest of the supplies are very affordable. You can find lots of vintage cards on Etsy or eBay. They’re super cheap and super fun for your artwork. My daughter finally fessed up to knowing the 411 on the jolly old elf, but we’ve known for a while she had it figured out. I just wanted to keep that Christmas magic alive as long as possible. This is a great holiday pic of Avalon from a few years back and I thought it could make a terrific gift for one of her Grandmothers or for us to use in our regular holiday décor. Teens can have a lot of fun with this project, and they get to enjoy a little bit of Christmas past if you use vintage cards. (Note: Don’t scan and copy the images from the cards and use them again, these images are under copyright. You can cut them out and use the physical card, but you can not reproduce the images. US copyright protection lasts 100 years.)
MaterialsOne wooden frame with heart shaped opening
Wired tinsel
Image from vintage greeting card
Text from vintage greeting card
Green cardstock
Aleene’s Fast Grab Tacky Glue Aleene’s Liquid Fusion Crafty Chica Little Paints White Tulip Fashion Glitter White Pearl Archival ink jet black
Adirondack ink red pepper
EK Success clear snowflake stamp
Inkadinkado flourish stamp
Dimensional foam stickers
EK Success metallic writer pen in silver
ToolsMartha Stewart lace edge punch
Scissors
Paper cutter
Tracing pen or pencil
Paint brush

1. Paint frame white. Sprinkle a fine layer of glitter over paint. Shake off excess. Allow to dry.
2. Randomly stamp snowflake over frame (try not to overlap) using archival ink in jet black.
3. Randomly stamp flourish over frame (try not to overlap) using Adirondack ink in red pepper.
4. Select image you like for bottom right corner of frame and cut it out. Use writer pen in silver to accent parts of image.
5. Spread a thin layer of glue on parts of image you’d like to coat with clear glitter. Sprinkle glitter on image and shake off excess. Allow to dry.
6. Cut out words you want to use. Using cardstock make a frame for the words. Use the scallop edge punch to decorate the edges of your frame. Adhere words to paper frame using two dimensional foam stickers.
7. Run a thick bead of Liquid Fusion along edge of frame. Place tinsel on edge, cut off excess. You can put some small glue bottles on the tinsel to secure it while it dries.
8. Adhere Santa to bottom right of frame using dimensional foam dots with a layer of Liquid Fusion under them.
9. Adhere text to top left of frame using dimensional foam dots with a layer of Liquid Fusion under them. Allow glue to dry overnight on images, text and tinsel.
10. Select and size a picture to fit the frame. Keep the cardboard insert to trace and cut image to fit inside of frame and to secure image inside of frame.


 Materials